
 Safety Glasses
 Nitrile Gloves
 21 mm Socket
 Ratchet
 Floor Jack
 Jack Stands
 Breaker Bar
 Box Wrench
 Torque Wrench
 Penetrating Oil
 Wheel Chocks
Today, we will be changing the shocks on this 2003 Silverado 1500, and the procedure will be similar on a lot of early Silverados from about 99 to 07, but be sure to know the specifics for your truck before getting started. If you’re not completely comfortable doing this yourself, we’d be happy to recommend a professional technician in your area.
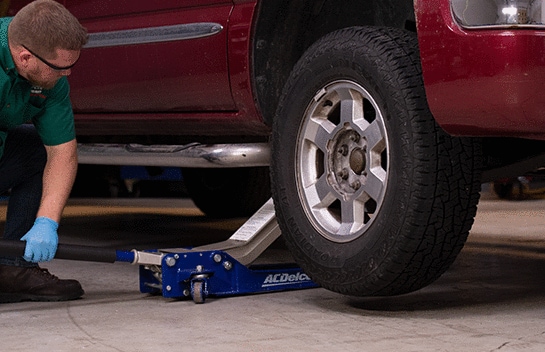
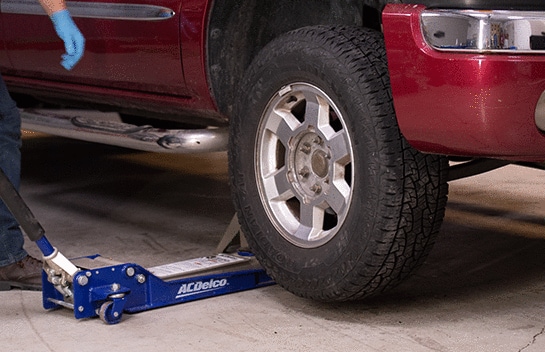
Step 1: Raise the Front of the Truck
Park on a level surface. Raise the front end of the truck and support the lower control arms with jack stands.
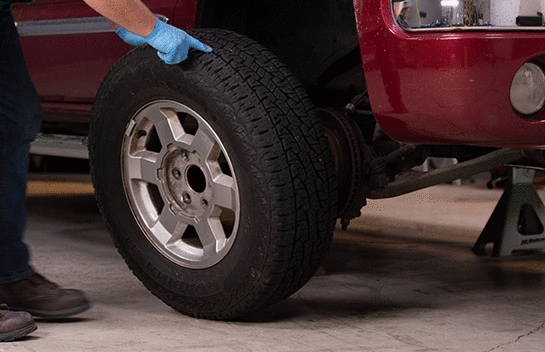
Step 2: Remove the Wheel
After removing the lug nuts, remove the front wheel and set aside for later.

Step 3: Remove the Upper Nut
Starting on one side, remove the nut at the upper end of the shock.
|
Do It Right: Applying penetrating oil will help when it comes time to loosen nuts and bolts. |

Step 4: Remove the Upper Insulator
Remove the upper insulator, but do not discard the plastic pilot ring.

Step 5: Remove the Mounting Bolt
Remove the shock absorber mounting bolt at the lower control arm.

Step 6: Remove the Shock Absorber
Remove the shock absorber from the vehicle.

Step 7: Set Aside the Old Shock Absorber
Set the old shock absorber next to your new shock to make sure you have the right replacement. There may be a slight difference in length due to different types of internal rebound bumpers or support springs, but it won’t affect performance.

Step 8: Prime the Shock Absorber
Before installation, prime the shock absorber by fully compressing and letting it extend on its own 4-5 times. This will ensure that the gas and oil are in the proper position inside the shock, and can help prevent unwanted noise when you start driving with the new shocks in place.
|
Do It Right: Be sure to have the shock upright with the dust boot or metal shield at the top when priming and when installing. |

Step 9: Place the New Shock Absorber
Lift the new shock absorber into place, inserting the stem through the hole in the shock bracket.

Step 10: Install the Bolt at the Lower Control Arm
Align the shock with the mounting holes in the lower control arm. Install the bolt at the lower control arm and tighten it to 59 foot pounds.

Step 11: Install the Upper Insulator
Install the upper insulator on the shock absorber and the nut on the tenon end. Don’t tighten the nut until the vehicle is lowered.
|
Do It Right: Except in unusual circumstances, it’s recommended you change shocks in pairs, so repeat these steps on the other side of the Chevy Silverado. |

Step 12: Re-install the Front Wheel
Position the wheel for installation and secure the wheel back into place with lug nuts.
Step 13: Lower the Truck
Remove the jack stands and lower the truck

Step 14: Secure the Tenon End
Secure the tenon end at the top of each shock while tightening each nut up to 15 foot pounds.


The automotive repair work depicted in this series is performed under the direction of the manufacturer of the product featured. Prior to undertaking any of the demonstrated repairs on your vehicle, we suggest you consult with a certified mechanic or another professional who can adequately advise you of the proper repair or remedy required. O’Reilly Automotive Stores, Inc. and its affiliates (“O’Reilly”) disclaims any responsibility for injury or damage resulting from a viewer’s attempt to recreate the repairs shown in this series.