
 Safety Glasses
 Safety Gloves
 VersaChem 0.025 Ounce Windshield Repair
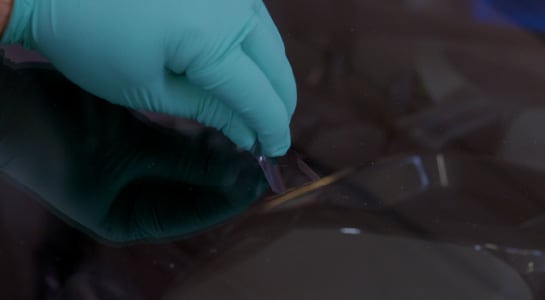
Prepare the surface of the windshield by scraping and cleaning any loose glass particles out of the pit. Use an alcohol wipe to clean the area surrounding the chip on both the inside and the outside of the windshield.

Step 1: Prep Your Windshield

Step 2: Place the Application Ring
Once the area is clean, peel the backing off one side of the application ring so that the adhesive on that side is exposed. Place it carefully on the windshield, with the exposed adhesive against the glass, the hole around the chip, and the tab pointed up. Now, peel the backing off the side facing you.

Align the plastic injector base with the ring you’ve secured around the chip, making sure the tabs are aligned and press it into place. Apply pressure all the way around the base to make sure the seal is airtight.

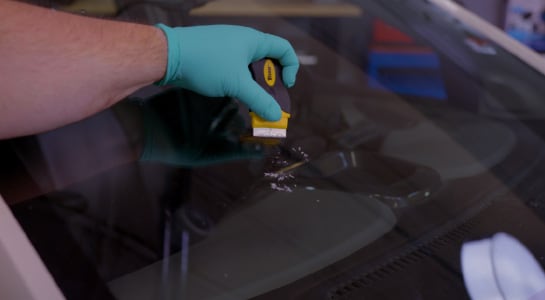
Step 3: Apply the Resin
Cut or twist the tip off the lid to your tube of resin. The tip will fit inside the tube on the injector base. Insert the tip into the base and squeeze three-quarters of the resin into the tube.

Remove the resin tube, insert the syringe into the base, and slowly pull the stopper up. Once it reaches the top, leave it there and let it sit for 10 minutes. After 10 minutes, remove the syringe briefly from the tube.

Reinsert the syringe back in the tube, turn the plunger sideways so that the notch in the middle will catch, and push the plunger back down till the middle notch stops at the hilt of the syringe.
Let it sit in this position for 20 minutes. After 20 minutes, remove the syringe.

Step 4: Remove the Adhesive Ring
Using a razor blade if needed, carefully remove the whole adhesive ring and base from the windshield.

Step 5: Check the Chip
Make sure the crack is completely filled and that it cures properly. Apply the remaining resin to the dimple in the windshield then lay the curing strip flat across it.

Spread the strip out as flat as possible against the repair and let it cure in the sun. Make sure NOT to park in the shade while the resin is curing.
Step 6: Let the Resin Cure
Once that last bit of resin has had a chance to cure in the sunlight for at least 15 minutes (one-hour minimum if it’s a cloudy day), then you can remove the curing strip.
|
Do It Right: If the surface is uneven, use your razor blade to carefully scrape any uneven spots or excess resin until the repair is flat against the surface of the glass. |


