
 Safety glasses
 Nitrile Gloves
 Jack
Jack
 Jack Stand
 Wheel Chocks
 Strut Assemblies
 Ratchet and Torque Wrench
 Sockets
 Breaker Bar
 Flathead Screwdriver
 Hammer
 Allen Wrench (5mm)
 B’laster Rust Penetrant

Step 1: Open The Hood
Park on a level surface and open the hood. Take off the small service panel to give yourself access to the top of the strut tower.

Step 2: Stabilize Your Vehicle
Chock the rear wheels.

Step 3: Loosen Lug Nuts
Loosen the lug nuts on the front wheels with a 19mm socket.

Step 4: Lift the Front End
Lift the front end of the Civic using a jack and securing with a jack stand.

Step 5: Remove Lug Nuts
Remove the lug nuts to the front wheels using your socket wrench.
|
Do It Right: It may be helpful to use rust penetrant a few minutes before using your wrench. |

Step 6: Remove Front Wheels
Finish removing the lug nuts on your wheel and remove the front wheels of your Civic.

Step 7: Removing the Wheel Speed Sensor Harness Clip
Remove your wheel speed sensor harness clip.

Step 8: Remove Brake Hose Bracket
Remove the brake hose bracket using a 12mm socket wrench.
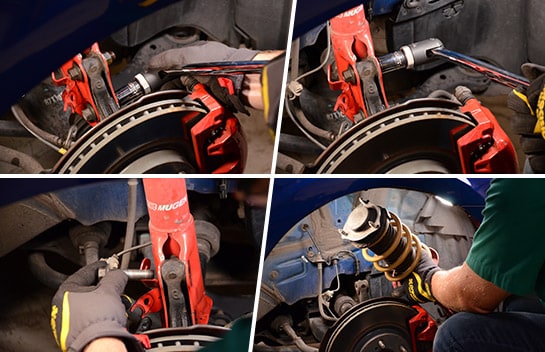
Step 9: Loosen Strut Assembly Nuts
Loosen the two nuts at the bottom of the assembly using a 19mm socket wrench and 17mm wrench. Use a 14mm socket wrench to loosen the three nuts from the top of the assembly. Remove the nuts and bolts at the bottom of the strut and carefully lift the strut assembly from the wheel well.
|
Do It Right: Compare your old strut with your new strut assembly to make sure you have the right part. Strut Assemblies should be changed in pairs, so repeat the following steps on the other side. |
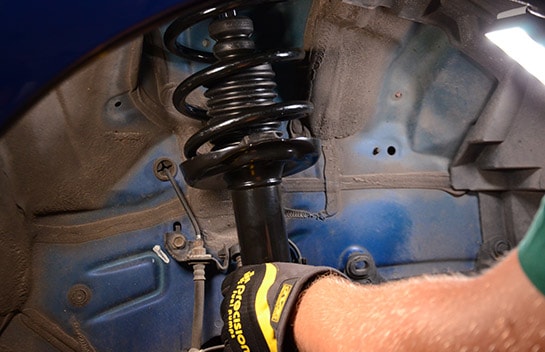
Step 10: Installing Your New Strut Assembly
Lift your new assembly into place, making sure the bracket at the bottom is positioned toward the outside of the car.

Step 11: Reinstall Nuts
Loosely reinstall the nuts at the top of the assembly and the nuts and bolts at the bottom of the strut assembly.

Step 12: Load the Suspension
Raise the front suspension with a floor jack to load the suspension with the vehicle’s weight.

Step 13: Tighten Nuts and Bolts
Tighten the top nuts using your 14mm socket wrench to 43 foot pounds. Use your torque wrench to tighten the bottom nuts to 67 foot pounds.

Step 14: Reinstall the Brake Hose Bracket
Tighten the bolt on the brake hose bracket to 16 foot pounds using a 12mm
socket wrench.
socket wrench.

Step 15: Reinstalling Parts
Reinstall the wheel speed sensor harness clip, service panel and weather strip back in place.
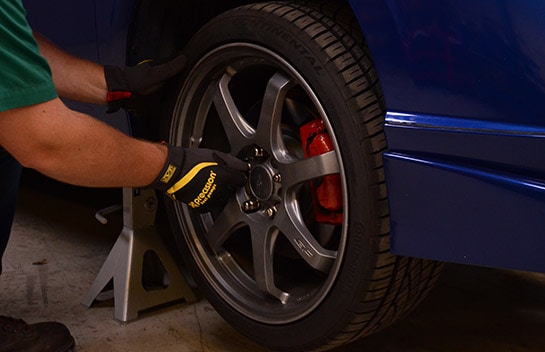
Step 16: Reinstall Wheels
Reinstall your wheels and tighten the wheel lug nuts with your fingers so that the wheels are flush against the wheel rotors.

Step 17: Tighten Your Lug Nuts
Lower the front part of your vehicle and close the hood. Take this time to remove the wheel chocks and to tighten the lug nuts in a star pattern to 80 foot pounds.


